Homemade Cherry Jam Recipe
Jellies or compotes and fresh fruits do not have the same properties. But consumed in moderation, this cherry jam allows you to benefit from the taste and properties of the fruit all year round.
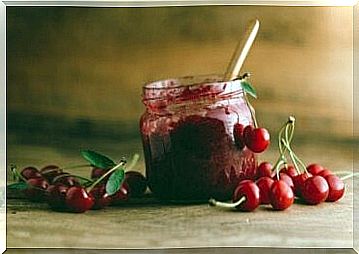
When spring fills the market with this nutritional treasure, it’s a good time to make homemade cherry jam. An ideal preparation to sweeten desserts, breakfasts or snacks for the whole family.
Recipe for making homemade cherry jam
If there is something positive about this recipe, it is that it is very easy to prepare. To prepare any homemade jam, the only ingredients needed are sugar, lemon and the fruits you like.
In addition, it only requires a little time during cooking, vigilance so that it does not stick and patience to remove the stones from the fruit. But the effort is worth it, because the end result is always delicious.
It can be used to prepare a classic breakfast and spread on buttered toast. It also adds a touch of sweetness to yogurt or a fruity touch to chia pudding. Also, it can be used to fill cookies or any type of cake.
Homemade cherry jam
Here is the basic recipe for an average amount of cherries. As it keeps well, you can use it to make more, while keeping the proportions. You can also make jams from other fruits and have a good assortment of them in the pantry.
Ingredients needed
- 500 grams of fresh cherries
- 250 grams of sugar
- 1/2 lemon
Step by step
- Before you start, prepare a bowl for pitting the cherries. This way all the juice they release is collected and is not wasted.
- Once pitted, weigh the cherries to calculate the exact amount of sugar needed. This is half the weight of the fruit. So, if there are 400 grams of cherries, add only 200 grams of sugar.
- Add the lemon juice and sugar over the cherries, pour them into the bowl with the juice and stir well to combine all the ingredients. Cover and let sit for about 1 hour.
- Put the mixture in a saucepan and cook it over high heat until it begins to boil. Then reduce the heat to low and continue cooking for 1/2 hour. It is necessary to stir from time to time with a silicone spatula so that the sugar does not stick.
- Once this time has elapsed, mix the cherry jam. The final texture depends on your taste. It can be completely smooth or you can leave a few pieces of fruit whole.
- To check that it is ready, pour some on a plate and run two fingers through it. If a thread forms between them when you pull them apart, then the jam is ready. Therefore, remove it from the heat and let it cool.
- Although the texture may appear to be runny, over the hours it acquires a thicker consistency.
- To store it safely, it is necessary to use sterilized jars. To do this, immerse the jars in boiling water for 10 minutes. Then keep warm until you are ready to use it.
- Fill with the still hot jam without filling the jar (leave a space of 1 centimeter). Cover and return to a pot with water. Let it boil over low heat for another 30 minutes to eliminate possible pathogens.
If you prefer a less sweet option, it is also possible to make jams without sugar or with other sweeteners, such as red fruit jam.
Ideal cookies to serve with cherry jam
This recipe makes cookies with a jam center that are a perfect accompaniment to a cup of tea or coffee. They can also be eaten as a dessert.
Ingredients needed for 600 grams of dough
- 3 hard-boiled or soft-boiled eggs
- 250 grams of wheat flour
- 125 grams of butter at room temperature
- 100 grams of sugar
- 1 teaspoon of vanilla extract
- Zest of a lemon
- Milk
- Homemade cherry jam
How to prepare them
- The first step is to separate the egg whites and yolks from the cooked eggs. Pass these through a sieve or a fine strainer.
- Then make a volcano with the flour and put the egg yolks in the center. Then add the butter cut into pieces, sugar, vanilla and lemon.
- Mix well until you have a smooth dough and wrap it in cling film to keep in the fridge for about 30 minutes.
- Flour a work surface and roll out the dough with a rolling pin. Ideally, the dough should be about 1/2 centimeter thick. Then shape the cookies with a round cookie cutter about 2 inches in diameter.
- It is necessary to make them twice as much as you want to put together, because in the end they are joined in pairs. With a smaller cookie cutter (2 centimeters in diameter), make a hole in the center, halfway through the cookies.
- Cover a baking sheet with parchment paper and place the pieces without the hole. Then place the biscuits with holes on top and brush them with a little milk for a brighter result.
- Fill the hole with a teaspoon of cherry jam.
- Bake in a hot oven at 170 degrees for 12 minutes. Take off heat and let cool.
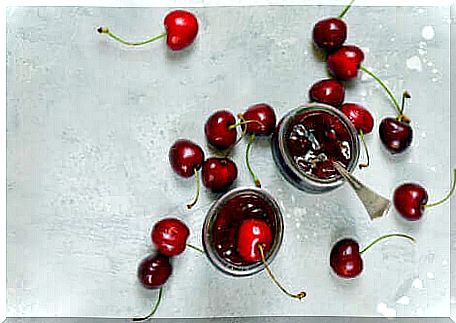
With cherry jam it is possible to enjoy this fruit all year round
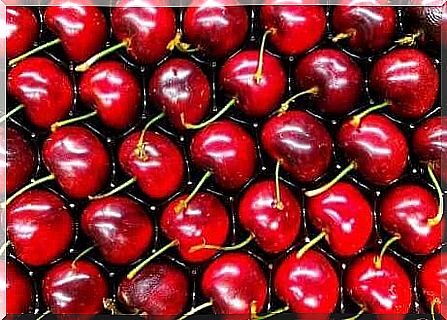
To prepare homemade cherry jam, it is best to take advantage of its optimal season. In this case, between May and July. This way the fruits have maximum flavor and the result is truly exceptional.
When shopping, it is best to choose the ones that have smooth and shiny skin without signs of bruising or spots. Dark colored ones are generally sweeter, while size does not seem to have any implications for flavor or sweetness.
Cherries are a low pectin fruit, so the end result is usually a bit lighter than other jams. To obtain a more dense texture, it is possible to add a kind of gelling agent (gelatin or pectin powder).
All foods prepared and packaged at home, such as jams, should be stored in dark, cool and dry places. The ideal temperature is between 10 and 21 degrees. Once opened, it is necessary to keep it in the refrigerator for about 1 month.
Prolonged periods can lead to loss of nutrients, as well as changes in smell, taste and texture. However, it is safe to consume if the jar remains intact and shows no signs of mold or yeast contamination.