How To Make A Coat Rack To Hang Your Hats?
Let your imagination run wild and use your manual skills to make your own coat rack from these simple ideas. You can use some reusable materials that you have at home.
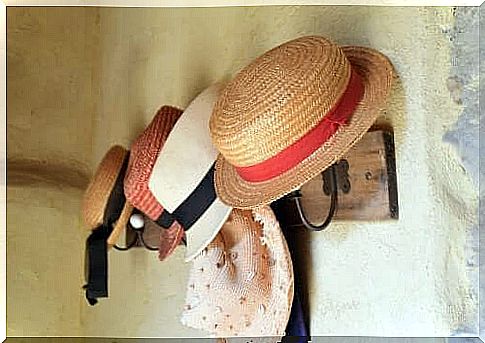
Nowadays, we see fewer and fewer coat racks in modern homes. However, it can be a very useful and decorative piece in any interior. On a coat rack you can hang your coats, your bag, your umbrellas and your hats.
With a little imagination, you can make a very contemporary or rustic coat rack, in keeping with the decor of your home and without having to spend a lot of money. Use only what you have on hand, recycle old items and you will have a coat rack in your image.
How to make a coat rack with bottles?
If you are looking for an idea to reuse your bottles, you can go for this interesting project. You can make a coat rack to hang your hats or any accessory.
What do you need ?
- 4 or 5 glass bottles (they can be more or less similar or different, depending on your taste)
- A rectangular glass or acrylic shelf
- A piece of string
- Alcohol
- A lighter
- A container with water
- Transparent glue
Instructions
- First, wrap the string around a bottle, about 2 inches below the neck. Make sure you only turn one round and that it stays in place.
- Then soak the string in alcohol, soaking it well.
- With the brick, ignite the string. You will probably have to try a few times if the fire goes out too quickly.
- After about a minute of continuous fire and before it goes out, put the bottle in the container with the water. You should hear a few clicks of the glass. This means that the bottle is cut all the way through the string.
- Repeat this process on the other bottles. Take measurements to cut them all to the same size.
- On the glass or acrylic shelf, mark the places where you want to stick the bottles.
- Apply clear glue, preferably with a glue gun.
- Glue the bottles to the location you marked on the glass or acrylic shelf.
- Finally, once the glue is dry, you can hang your new coat rack on the wall using nails or screws with dowels.
Coat rack with forks
Do you have old forks that you no longer use? Turn them into coat racks to hang your hats. You will only have to curl them to give them the desired shape.
What do you need ?
- Old forks
- Pliers
- A drill with a bit for metal
- A piece of wood
Instructions
- To start, place the fork on the wood and secure it with tape or string.
- Then, with the drill, make a small hole on the upper part of the fork gap.
- Remove the fork and with the pliers, curl the handle upwards, more or less from the center.
- You can also curl a few teeth of the fork, to your liking.
- Finally, hang the fork on the wall using the hole you made at the start. You can also hang the forks from a piece of wood and then nail the wood to the wall.
Rustic coat rack
Rustic coat racks are ideal for people who love this style. They also go very well in spaces with vintage decoration .
What do you need ?
- Hooks for coat racks (you can find them in hardware stores)
- Wood
- Nails and hammer
- Painting
- Hanging hooks
Instructions
- First, cut several rectangular pieces of wood, about the same size.
- Then paint it to your liking.
- Place them next to each other with a thinner wooden board at the top and another at the bottom.
- Then nail the thinner wood planks at the top and bottom with small, thin nails.
- Between the two wooden planks, nail the hooks of the coat rack to each piece of colored wood.
- Finally, you can hang your coat rack directly on the wall with screws and dowels or by placing hooks on the back and then hooks on the wall.
Have you ever tried to make these coat racks to hang your hats? As you just noticed, they are easy to make and you can use any materials you have at home.